I recently built a new PC with Windows 11 Home and noticed it doesn’t have access to BitLocker, unlike my other machines and my work laptop. This got me thinking about my file security situation, and I realized that if I’m going to encrypt my files for the long term, I need a more reliable solution that works across all my devices. That’s when I discovered VeraCrypt, and it completely changed how I think about file protection.
For years, I’ve relied on various cloud storage solutions, assuming they were adequately protecting my data. However, the recent headlines regarding data breaches and privacy concerns have made me reconsider this approach. The reality is that relying solely on third-party providers puts your files at their mercy. VeraCrypt offers a powerful alternative: complete control over encryption keys. It provides robust file protection across Windows, macOS, & Linux.
What Is VeraCrypt?
VeraCrypt is a free, open-source disk encryption software based on the earlier TrueCrypt project. It allows you to encrypt entire partitions or create encrypted containers (virtual disks) within your existing file system. The beauty of VeraCrypt lies in its portability – it’s available for Windows, macOS, and Linux, ensuring your encrypted files are accessible regardless of your operating system. Notably, VeraCrypt is a reliable solution for anyone needing secure file storage.
Getting Started with VeraCrypt: A Simple Guide
Setting up VeraCrypt is surprisingly straightforward. Here’s a simplified breakdown:
- Download & Install: Grab the latest version from veracrypt.fr and follow the installation prompts.
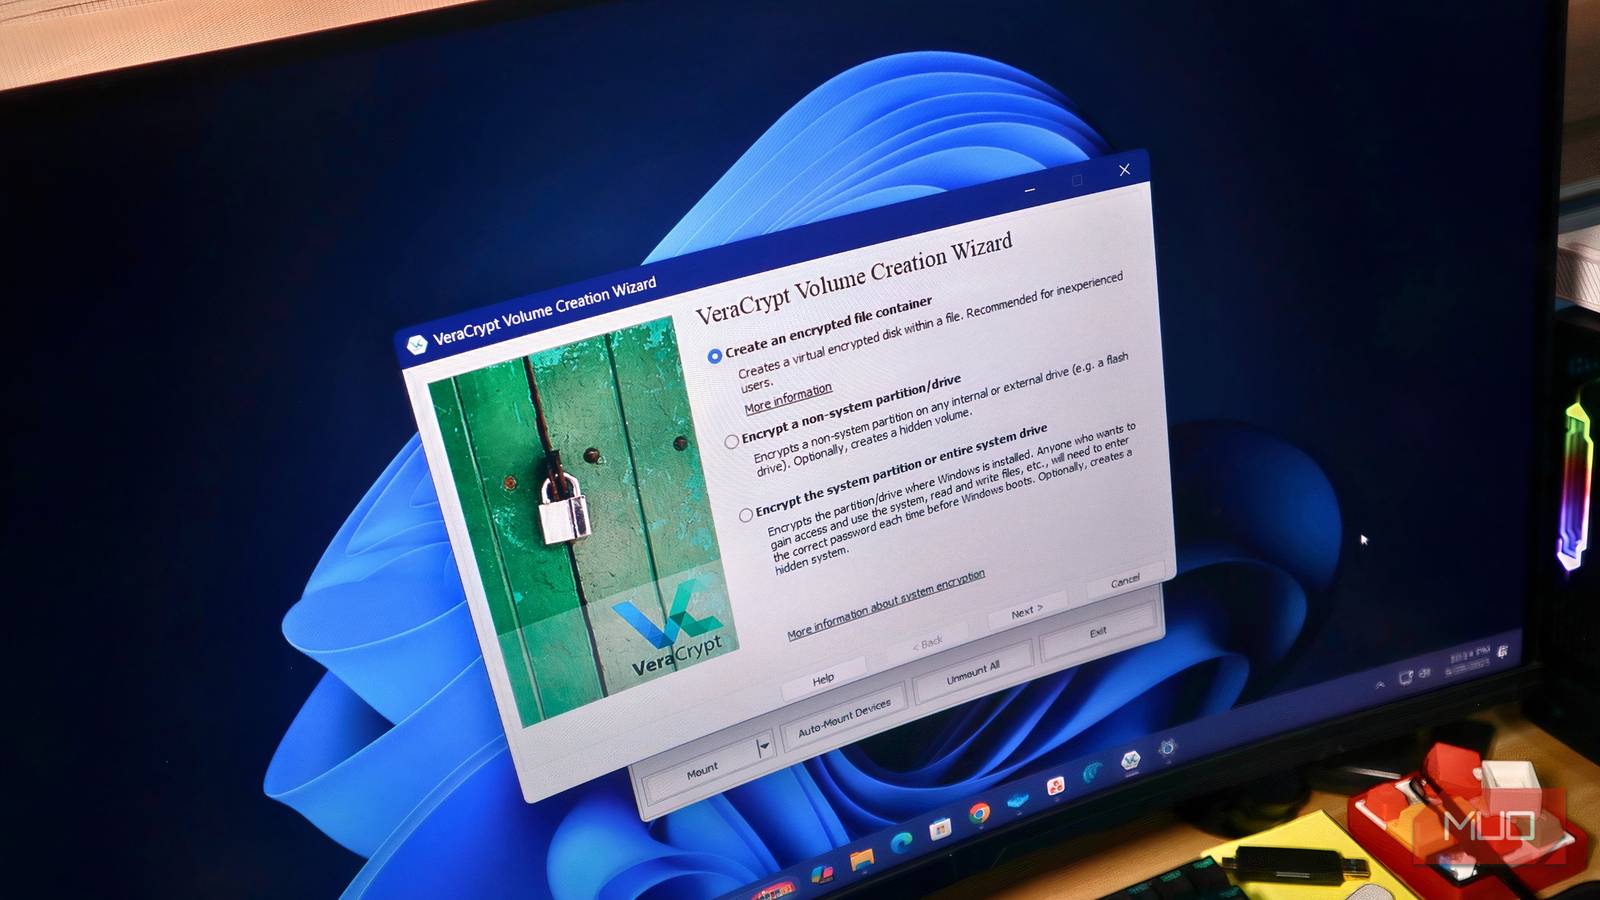
- Create a Volume: This is essentially creating an encrypted container. You can choose between two options: Creating an encrypted file container (a portable, hidden volume) or encrypting an entire partition or drive. For beginners, starting with an encrypted file container is recommended.
- Choose Encryption Algorithm & Size: VeraCrypt offers several encryption algorithms (AES, Serpent, Twofish). AES is generally a good choice for its speed and security. Determine the size of your volume based on how much data you plan to store within it.
- Set a Strong Password: This is crucial! Choose a complex password that’s difficult to guess. Consider using a passphrase – a long, memorable sentence.
- Mount the Volume: Once created, you can “mount” your encrypted volume, which makes it accessible as if it were a regular drive letter. You’ll need to enter your password to mount it.
Why VeraCrypt is Superior for Long-Term File Protection
While BitLocker offers convenient built-in encryption on Windows Pro and Enterprise editions, VeraCrypt provides several advantages:
- Cross-Platform Compatibility: Works seamlessly across Windows, macOS, and Linux.
- Open Source & Auditable: The open-source nature allows for independent security audits, increasing confidence in its robustness.
- More Flexible Encryption Options: Offers a wider range of encryption algorithms and volume types.
- No Dependency on OS Editions: Unlike BitLocker, VeraCrypt isn’t tied to specific Windows editions.
Furthermore, the ability to create portable encrypted containers means your sensitive files are shielded even if you switch operating systems or devices. In addition, using veracrypt allows for greater control over data security.
Conclusion: Taking Control of Your Data
Switching to VeraCrypt was a simple yet impactful decision that significantly enhanced my file security posture. It’s empowering to have complete control over encryption keys and the knowledge that my data is protected regardless of where I access it. For example, veracrypt offers peace of mind knowing your files are secured. If you value your privacy and want a reliable way to safeguard your files, give VeraCrypt a try – you won’t regret it. Ultimately, choosing veracrypt is investing in your data’s safety.
Source: Read the original article here.
Discover more tech insights on ByteTrending.
Discover more from ByteTrending
Subscribe to get the latest posts sent to your email.