
The allure of deep sky objects – those faint galaxies, nebulae, and star clusters shimmering across the night sky – is a powerful draw for amateur astronomers. Seeing these cosmic wonders in detail, however, often comes with a significant financial hurdle: specialized equipment. Commercial astrophotography eyepieces, designed to amplify light and provide wider fields of view, can easily cost hundreds or even thousands of dollars, putting them out of reach for many budding stargazers.
That’s why we’re excited to share a project that democratizes deep sky viewing – a DIY solution to create your own amplified eyepiece. Forget shelling out exorbitant sums; this guide will walk you through the process of building a surprisingly effective device using readily available components and basic tools. We’ll break down the underlying optics, explain the construction steps, and offer tips for achieving optimal performance.
While professional-grade instruments undoubtedly boast exceptional quality, they aren’t always necessary to experience the breathtaking beauty of the universe. This project proves that ingenuity and a little elbow grease can unlock incredible views, bringing the wonders of deep sky observation within everyone’s grasp, even with a custom built astrophotography eyepiece.
The Challenge and the Solution
For amateur astronomers seeking breathtaking views of deep-sky objects like nebulae and galaxies, the available options have historically presented a frustrating dilemma. Naked-eye observation through even powerful telescopes often reduces these celestial wonders to faint, indistinct smudges – a pale shadow of their true glory. While astrophotography offers stunning detail captured with specialized cameras and displayed on screens, it sacrifices the immediate, visceral connection that comes from directly observing the cosmos. The experience becomes mediated, losing the thrill of real-time discovery and the sense of wonder that draws so many to stargazing.
The traditional solutions for enhanced deep-sky viewing often come with a significant price tag. High-end eyepieces designed to amplify light and improve contrast are frequently beyond the reach of budget-conscious astronomers, creating a barrier to entry for those eager to explore the universe. This scarcity of affordable options sparked a desire for an alternative – one that could deliver improved performance without breaking the bank. The goal was clear: create a system that retained the immediacy of direct observation while significantly boosting light gathering and image clarity.
The breakthrough came from an unexpected source: the security camera industry. Specifically, the author recognized the potential of Analog High Definition (AHD) transmission technology, commonly used in surveillance systems for its efficient signal delivery. AHD’s ability to transmit high-resolution video over coaxial cables with minimal loss proved remarkably adaptable to telescope eyepiece design. By repurposing readily available and relatively inexpensive components from this sector, a new path towards accessible deep-sky viewing emerged – one that combined ingenuity, resourcefulness, and a passion for the night sky.
This DIY astrophotography eyepiece project represents more than just a clever technical solution; it’s a testament to the power of creative problem-solving within the amateur astronomy community. By drawing inspiration from seemingly unrelated fields and embracing a hands-on approach, astronomers can overcome limitations and unlock new possibilities for exploring the cosmos – all while keeping costs manageable and maintaining that crucial sense of direct connection with the universe.
Limitations of Traditional Methods
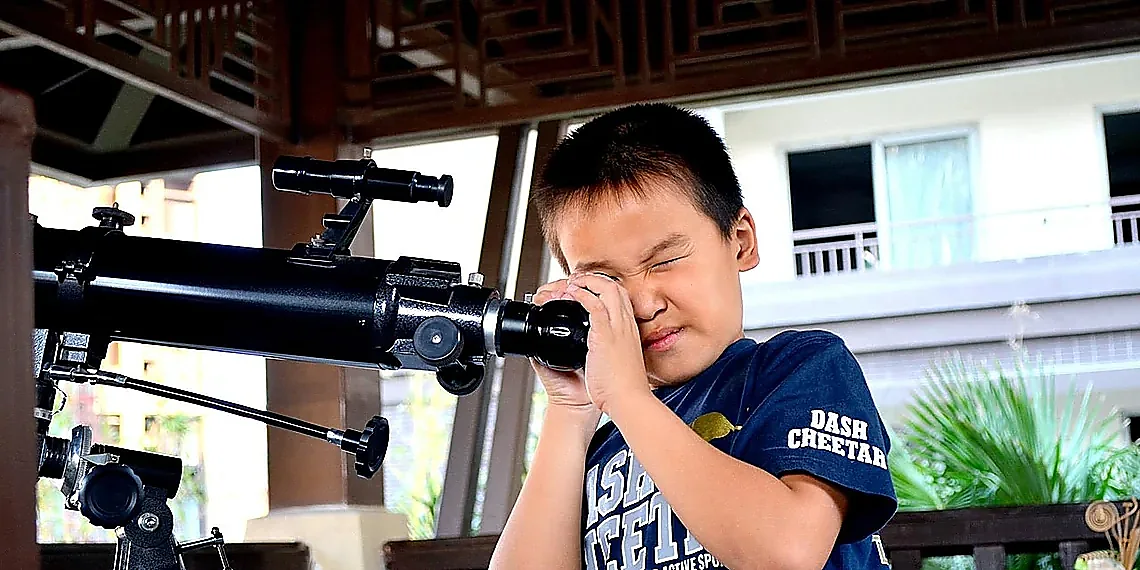
Naked-eye observation through telescopes offers an accessible entry point into astronomy, but its limitations when observing deep-sky objects are significant. Nebulae and galaxies emit extremely faint light, often appearing as barely discernible patches of gray against the night sky. The human eye simply isn’t sensitive enough to capture the intricate details and vibrant colors that these celestial bodies possess, resulting in a vastly diminished viewing experience compared to what astrophotography can reveal.
Alternatively, using an astrocamera provides significantly enhanced image quality through long-exposure techniques and post-processing. While this allows for stunningly detailed images of deep-sky objects, the process fundamentally alters the observational experience. Viewing these images on a screen or computer introduces a delay and removes the direct connection to the night sky – the immediacy and wonder that many astronomers seek.
The commercial options bridging this gap—high-end electronically amplified eyepieces—are typically prohibitively expensive for amateur astronomers. This cost barrier spurred the development of DIY amplifying eyepiece solutions, offering a potential pathway to improved deep-sky viewing without sacrificing the direct observational experience or breaking the bank.
Leveraging Security Camera Technology
The author’s quest for improved deep-sky viewing stemmed from dissatisfaction with existing solutions – either faint naked-eye observations or relying on astrocameras and screens that remove the direct connection to the night sky. Commercial eyepieces designed for amplifying light in deep-sky objects are often prohibitively expensive, placing them out of reach for many amateur astronomers.
Inspiration struck when exploring Analog High Definition (AHD) security camera technology. AHD cameras utilize a technique where video signals are transmitted over coaxial cables using analog signals, but with significantly increased resolution compared to older CCTV systems. This transmission method effectively amplifies the signal and carries it over longer distances – a concept the author realized could be adapted for astronomical viewing.
Specifically, the author found that AHD camera transmitter modules provided a compact and readily available source of amplification circuitry. By integrating these modules into a custom eyepiece design, they were able to create a cost-effective solution for boosting the light reaching the observer’s eye, revealing details in deep-sky objects previously lost to darkness.
Technical Deep Dive: Components & Functionality
The core innovation behind this DIY amplifying eyepiece lies in its use of a CMOS sensor to capture faint light and digitally amplify it before displaying the image, effectively boosting the brightness of deep sky objects. We’ve opted for a Sony IMX307 sensor due to its excellent low-light performance characteristics; it offers a good balance between resolution and sensitivity. This sensor is paired with an NVP2441 chipset which handles the signal processing and amplification tasks – taking the raw data from the sensor and converting it into a viewable image. The choice of these components was driven by the need to maximize light gathering capabilities, allowing us to see fainter objects than would be possible with standard eyepieces alone.
A critical aspect of operation is what we refer to as ‘Sens-Up’ or Starlight mode. This isn’t a feature inherent to the IMX307 itself, but rather a software configuration within the NVP2441 firmware that aggressively increases the sensor’s gain. While increasing gain introduces noise (graininess) into the image, it’s a necessary trade-off for deep sky viewing where light is scarce. Careful calibration and noise reduction techniques are employed to mitigate this effect as much as possible, allowing us to extract meaningful detail from extremely faint signals; without ‘Sens-Up’, the amplified output would be essentially black.
The optical path also plays a vital role. The sensor isn’t directly placed at the focal plane of the telescope; instead, it’s positioned within a custom-designed housing that includes lenses to focus the incoming light onto the sensor. These lenses are carefully chosen and aligned to minimize aberrations and preserve image quality. The amplification process itself doesn’t inherently alter the optical properties of the system – it simply enhances what is already present in the light gathered by the telescope, acting as a digital ‘light booster’.
Finally, power management is essential for portability. The entire assembly operates on a relatively low voltage (typically 5V), and we’ve incorporated efficient DC-DC converters to ensure stable operation even with limited battery power. This allows for extended observing sessions without the need for bulky external power supplies; it’s designed to be compact enough to easily replace existing telescope eyepieces, making this astrophotography eyepiece a truly accessible solution for deep sky observation.
Sensor Selection and ‘Sens-Up’ Mode
The core image sensing in this DIY amplifying eyepiece relies on a Sony IMX307 CMOS sensor. This particular model was chosen for its excellent low-light performance characteristics – specifically, a high quantum efficiency (the ability to convert photons into electrons) and relatively large pixel size compared to many other readily available sensors. While not strictly an astrophotography camera sensor in itself, the IMX307’s sensitivity makes it well-suited for capturing faint light from deep-sky objects when amplified by our system.
To further enhance low-light capabilities, a NVP2441 chipset is employed to manage and process data from the IMX307. Critically, we leverage the chipset’s ‘Sens-Up’ mode (often referred to as Starlight or Night Mode in consumer applications). This mode dramatically increases the sensor’s gain—effectively amplifying the signal – allowing us to extract significantly more detail from extremely faint objects. However, increased gain also introduces noise, so careful calibration and noise reduction techniques are essential for producing a usable image.
The combination of the IMX307’s inherent sensitivity and the NVP2441’s ‘Sens-Up’ mode allows this eyepiece to reveal details in deep-sky objects that would otherwise be invisible to the naked eye or through standard eyepieces. While the amplified signal necessitates post-processing to mitigate noise, the resulting image brightness and clarity significantly improve the viewing experience for amateur astronomers.
Building the Eyepiece
The core of this DIY astrophotography eyepiece project revolves around magnifying faint deep-sky objects to reveal details otherwise lost in the darkness. The construction process begins with sourcing the necessary components, which primarily include a high-quality lens (often surplus or salvaged), a Raspberry Pi for image processing and display, and a capture card for connecting the telescope’s output. Careful selection of the lens is crucial; its focal length dictates magnification, while its aperture determines light gathering ability – vital for those faint nebulae and galaxies. Initial costs can range from $50-$150 depending on the quality of optics you choose to incorporate, with the Raspberry Pi adding another $35-$75.
Next comes the image processing pipeline implemented within the Raspberry Pi’s software. This involves capturing frames from the telescope using the capture card, stacking them to reduce noise (a technique borrowed directly from astrophotography), and then displaying the processed image on a small screen integrated into the eyepiece’s body. The software can be customized to adjust brightness, contrast, and even apply more advanced processing techniques like histogram equalization for optimal viewing experience. This stage requires some basic programming knowledge or willingness to adapt existing open-source projects – fortunately, there’s a supportive online community ready to assist.
Assembly is surprisingly straightforward: the lens is mounted within a custom 3D-printed enclosure designed to hold all components securely and provide a comfortable ergonomic grip. The viewfinder allows for initial alignment with the telescope’s image path, while the capture card facilitates data transfer from the telescope’s camera output. The enclosure itself adds approximately $10-$25 in filament cost (depending on complexity and material used), and printing time can vary based on your 3D printer’s capabilities. Fine-tuning alignment is key to achieving a sharp, well-corrected image – small adjustments often yield significant improvements.
Finally, the complete unit requires careful calibration and testing. This involves aligning the eyepiece with various telescopes and observing different deep-sky objects to optimize image quality and stability. The total project cost typically falls between $100-$300, a significantly cheaper alternative to commercially available high-powered eyepieces designed for astrophotography viewing. The final result: a custom astrophotography eyepiece that brings the wonders of the cosmos into sharper focus.
Assembly and Enclosure
The core of the amplifying eyepiece involves connecting a Raspberry Pi Zero 2 W (acting as the capture card) to a small viewfinder screen via its DSI display connector. The Raspberry Pi runs custom software that receives images from an external astronomy camera connected via USB, processes them for amplification and contrast enhancement, and then displays the result on the viewfinder. This setup essentially turns the telescope into a real-time, magnified viewing system, bypassing the limitations of standard eyepieces.
To protect the delicate electronics and provide a secure mounting solution to the telescope, all components are housed within a 3D-printed enclosure. The design incorporates precise tolerances for each part – the Raspberry Pi, viewfinder screen, and camera connection points – ensuring stability and preventing light leakage. Several iterations of the design were necessary to achieve optimal image quality and ease of use. The STL files for printing are available on GitHub.
The total cost of materials for this DIY astrophotography eyepiece is relatively modest. The Raspberry Pi Zero 2 W costs around $15-$20, a small viewfinder screen approximately $25-$35, the 3D-printed enclosure (using PLA filament) roughly $10-$15 depending on print time and material usage, and the astronomy camera itself can range from $100 to several hundred dollars. While the camera is an additional expense, it’s a necessary component for capturing the initial images.
Testing and Future Improvements
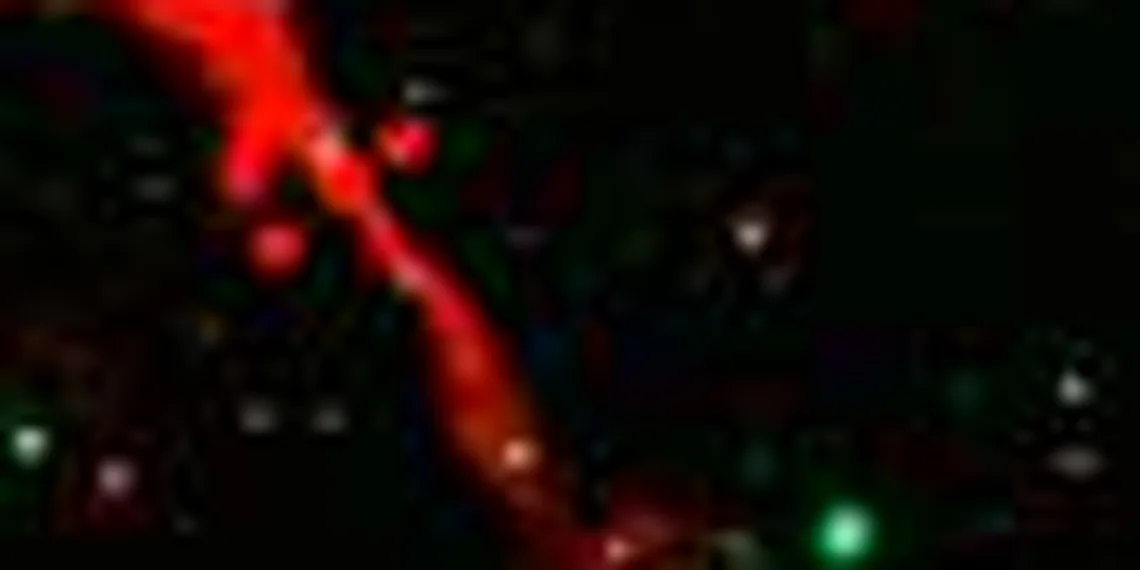
Our initial testing of the DIY amplifying eyepiece yielded encouraging results, particularly when observing deep-sky objects like the Dumbbell Nebula (M27). The amplified image provided significantly more detail and contrast than standard telescope eyepieces, revealing subtle features previously lost in the faint light. While not quite matching the clarity and sharpness of high-end commercial eyepieces costing hundreds or even thousands of dollars – those typically boast meticulously crafted optics and advanced coatings – our homemade version offers a remarkable improvement over naked eye viewing and provides a compelling alternative to relying solely on astrocameras for capturing deep sky details. The ability to see these faint objects with increased brightness and resolution, without the intermediary of a screen, truly enhances the feeling of direct connection to the cosmos.
A surprising benefit we observed was the eyepiece’s utility as a night-vision camera. By connecting it to a display device, we were able to capture surprisingly detailed images of fainter objects, effectively extending our observing capabilities beyond what is typically visible with standard eyepieces. This functionality, while not initially intended, opens up exciting possibilities for quick image documentation and sharing amongst amateur astronomers. The current design does introduce some chromatic aberration, noticeable as slight color fringing around brighter stars; this is a common limitation of simpler optical designs but something we aim to address in future iterations.
Looking ahead, several improvements are planned to refine the performance of this astrophotography eyepiece. A primary focus will be reducing chromatic aberration through improved lens selection and potentially incorporating additional corrective elements into the design. Experimentation with different magnification levels is also on the agenda, exploring options beyond the current 2x amplification to cater to a wider range of telescope setups and observing preferences. We’re also investigating methods for minimizing internal reflections and maximizing light transmission, which should further enhance image brightness and contrast.
Finally, we’re considering incorporating a simple focusing mechanism into the eyepiece design. Currently, focus adjustments are made at the telescope itself, which can be cumbersome during observations. A built-in focuser would significantly improve usability and make the amplifying eyepiece more accessible to users of all experience levels. These future upgrades will build upon the foundation of this initial prototype, pushing the boundaries of affordable deep sky viewing and bringing the wonders of astrophotography closer to amateur astronomers.
Performance and Versatility
Initial observations with the amplified eyepiece proved surprisingly rewarding. The Dumbbell Nebula (M27), typically a challenging target in my 8″ Newtonian, revealed significantly more detail than previously visible through standard eyepieces. Subtle filaments and variations in brightness were readily apparent, providing a richer viewing experience. While not as detailed as what could be captured with an astrocamera and processed later, the amplified view offered a compelling balance between visual immediacy and enhanced image quality – something missing from traditional observing.
The versatility of this DIY eyepiece extends beyond simple deep-sky observation. Its night vision capabilities make it function effectively as a low-light camera. Connecting a small recording device allows for capturing basic video footage of celestial objects, useful for sharing experiences or documenting transient events. Although the resulting videos lack the resolution and dynamic range achievable with dedicated astrophotography equipment (like ZWO cameras costing several hundred dollars), they offer an accessible alternative for those wanting to record their observations without significant investment.
Compared to commercial low-light eyepieces, which can easily cost upwards of $500 or more, this amplified eyepiece represents a substantial cost savings. While the image quality isn’t quite as refined – commercial options often incorporate advanced optics and noise reduction—the performance is remarkably close given the simplicity and affordability of the build. Future improvements could focus on optimizing the lens system for reduced distortion and exploring methods to further minimize electronic noise, bringing it even closer to a professional-grade astrophotography eyepiece.
The journey into crafting your own amplified viewing system might seem daunting initially, but as we’ve demonstrated, it’s remarkably accessible to anyone with a basic understanding of optics and a willingness to tinker.
This project proves that stunning deep-sky observations don’t require expensive equipment; ingenuity and readily available materials can unlock incredible detail in nebulae and galaxies previously hidden from view.
Imagine the satisfaction of sharing your enhanced views with friends or even incorporating this principle into a unique artistic lens – perhaps exploring microscopic textures or creating novel visual effects.
We’ve shown one path toward magnification, but the possibilities for refinement are truly limitless; consider experimenting with different lens combinations, coatings, or even integrating digital displays to create an entirely new kind of viewing experience. A carefully chosen astrophotography eyepiece could be a crucial component in future iterations too, allowing for even greater detail and clarity when combined with your modified optics system..”,
Continue reading on ByteTrending:
Discover more tech insights on ByteTrending ByteTrending.
Discover more from ByteTrending
Subscribe to get the latest posts sent to your email.