
The latest issue of Raspberry Pi Official Magazine dives into marine technology, discovering some Raspberry Pi–powered sea-based projects. We particularly liked this guide on how to build a tiny open-source underwater vehicle with Raspberry Pi Pico.
About a decade ago, we were inspired by a workshop at Liverpool Makefest where an organisation called the Dark Water Foundation made all manner of water monitoring devices.
Dark Water Foundation got attendees to make miniature palm-sized underwater rovers using Lego, 35mm film canisters, and some small brushed DC motors. “DC motors?” you might ask. Well, the revelation on seeing this workshop was that small 3–6V DC motors run really well in fresh water without any attempts to waterproof them. However, it’s worth noting that this may shorten their lifespan somewhat, and a little drying out is needed after each mission.
Many of the original links to this workshop are now missing; so, with absolute respect for the original project, we decided to make a more modern attempt influenced by that original design. There still is an Instructables page with some images and component lists, but sadly the links to components from the page aren’t currently working, so we’ve made some educated guesses and experimented to come up with a working solution.
The original design was around a 60–75mm cube for the frame made from Lego. We set out to 3D-print a similar-sized frame using the free and open-source FreeCAD package to realise our ideas. The original design used 30mm brushed DC motors and we discovered that these at one time were rated to 5400rpm. We couldn’t find that exact specification, but found some close enough listed as 3–6V and 6500rpm. These are perfect because we intend to make a moderately more advanced controller for our design — we can use motor drivers to control our speed.
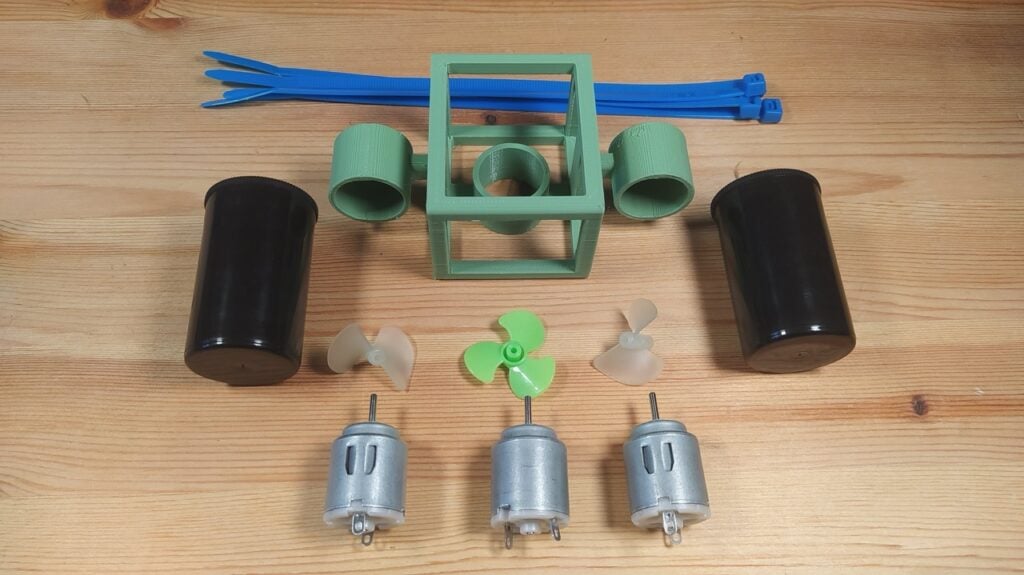
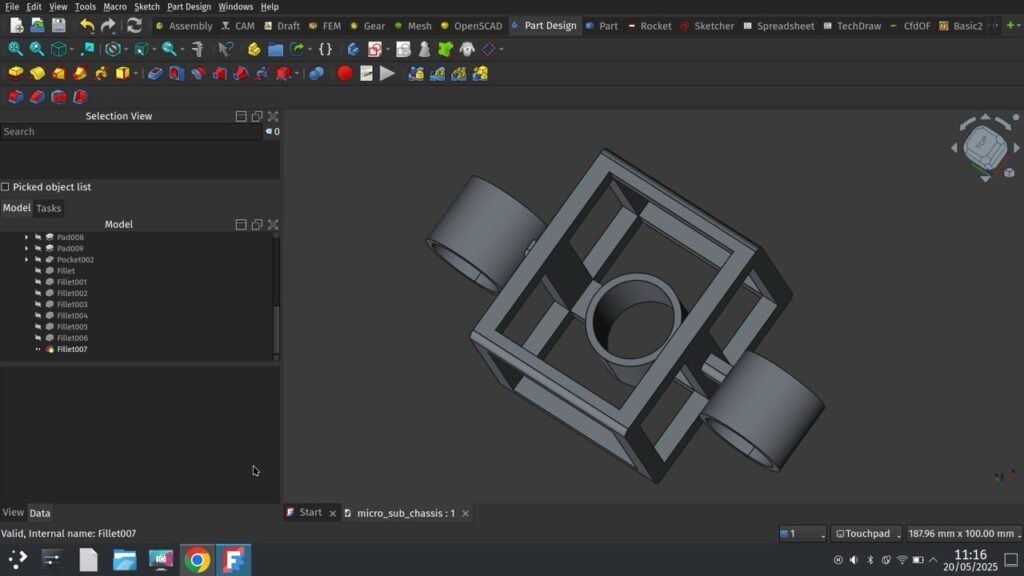
Once the motors arrived (Figure 1), we could then grab a set of callipers and take some motor measurements and begin our CAD work. In FreeCAD, we used the Part Design workbench to create the chassis, building up the frame by adding sketches to faces and extruding them (Figure 2). Our main chassis area is a cuboid frame with three thrusters: two set up for forward and turning (and potentially reverse if needed) on the sides of the frame, and one inside the frame, set in the vertical axis to control vertical position. The two horizontal thruster mounts are offset slightly from the centre in an attempt to distribute the weight a little.
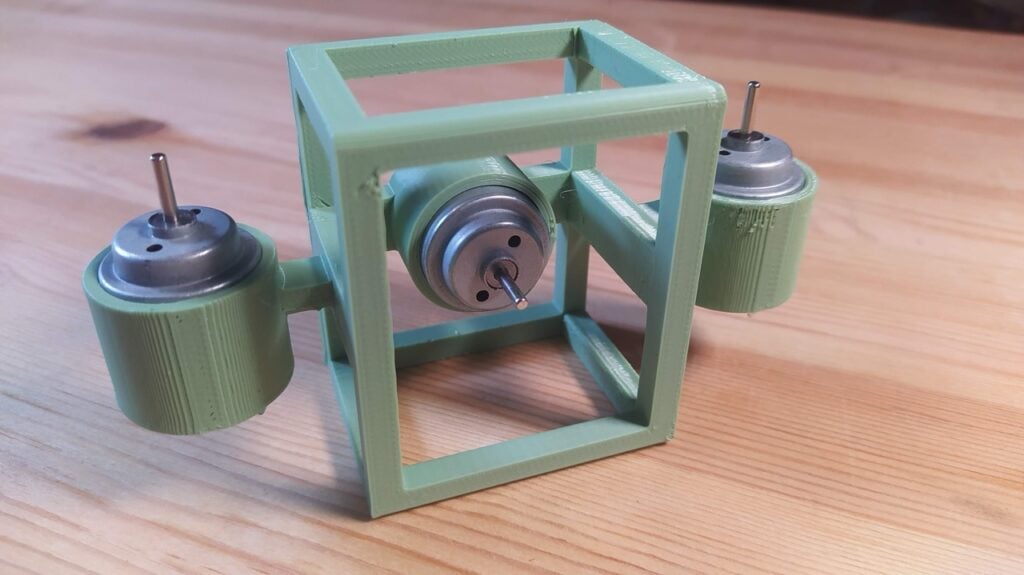
Getting the motor shaft diameter right was key, and we had to iterate on our design quite a few times. We found that a 5mm diameter shaft fits nicely into the film canisters, but they aren’t all created equal – some are slightly too tight!
Controlling Your TOUV
The Raspberry Pi Pico is used as the brains of this project, handling motor control and potentially providing a means of communication with other devices. The motors require an H-bridge circuit to change their polarity, which allows us to reverse them and vary their speed. A simple implementation would be using a dedicated driver IC such as the L298N. This chip can drive two DC motors independently; however, we’re planning to use more advanced drivers in future iterations of this underwater vehicle project.
Future Development
There’s still lots that could be improved and expanded on for this open-source underwater vehicle. For example, one idea is to add a depth sensor so that the TOUV can maintain a specific depth, or perhaps even follow a predefined path.
Source: Read the original article here.
Discover more tech insights on ByteTrending.
Discover more from ByteTrending
Subscribe to get the latest posts sent to your email.